
Satin Egg Dye Project
 This year we decided to try dying eggs with pieces of silk. It was a super fun project. A little labor-intensive at the start, but now that we have our initial supply of silk and cotton, we definitely plan to do this annually.
 We found a 100% cotton sheet at the thrift store for a few bucks. Taevy cut it up into about 10" squares.
 We scoured our local thrift stores for 100% ties, scarves, shirts, etc.. I can tell you now that the best patterns are the smallest patterns! Also, the darker the color, the better. We spent about $40 to purchase 15 ties, a few scarves, and a few nighties. If we weren't shopping last minute for these items we could have spent MUCH less. This year I'll keep an eye out for 100% silk items and buy them when they are like 1/2 off or .99 at the thrift store.
After we purchased the silk we had to cut it up into squares large enough to wrap around the eggs. Each tie gave us 2 eggs worth and each scarf gave us maybe 4-6 eggs worth of silk. You must remove any lining from the ties so that you ONLY have silk remaining.
 We chose to blow our eggs out so that we could save them and use them to decorate our house each year. This definitely adds some labor to the process! We used small nail to puncture each end of the egg, then a wooden skewer to enlarge the hole. We did have a few that cracked larger than we wanted, but practice makes perfect! After we blew the eggs out we washed the goop off, then used the spray nozzle to refill the eggs with water.
 The kids each came in and chose their favorite piece of silk. Then we wrapped the silk right side facing the egg (VERY IMPORTANT!). After wrapping the egg with silk, we wrapped the egg with a piece of cotton. Then we wrapped a twist tie around the top of the egg (tootsie roll style).
 Next we added the eggs twist tie up, single layer, in a pot of water (1/2 inch over the eggs) and 1/4 cup vinegar. Remember when I refilled the eggs with water? That's because empty eggs float! Even our semi-filled-with-water eggs floated. We added several plates on top of the eggs to make sure they were submerged. It was quite frustrating. Those buggers wanted to float! If you don't blow out your eggs, you won't have this problem.
 After bringing the eggs up to a boil and then simmering for 25 minutes, we removed the eggs. The water was full of dye. =-)
 We laid our eggs on cookie racks to cool. The must cool COMPLETELY before you unwrap them. Don't get impatient!!!
 We let ours cool for about half an hour. As you can see, you can see the dye through the white cotton. But is the dye on the egg?!?!
 The most fun part of the whole project was taking off the cotton and then slowly removing the piece of silk. It was like opening up a cool little Easter present!
 These are our finished projects! As you can see, it's REALLY important to have as few creases as possible when you are wrapping the eggs. The places where there are creases did not dye. I didn't know this when we were doing ours, but it is also important to wrap the top TIGHTLY against the egg. I left space between the egg and the twist tie, which resulted in almost all of our eggs having a white area on the top.
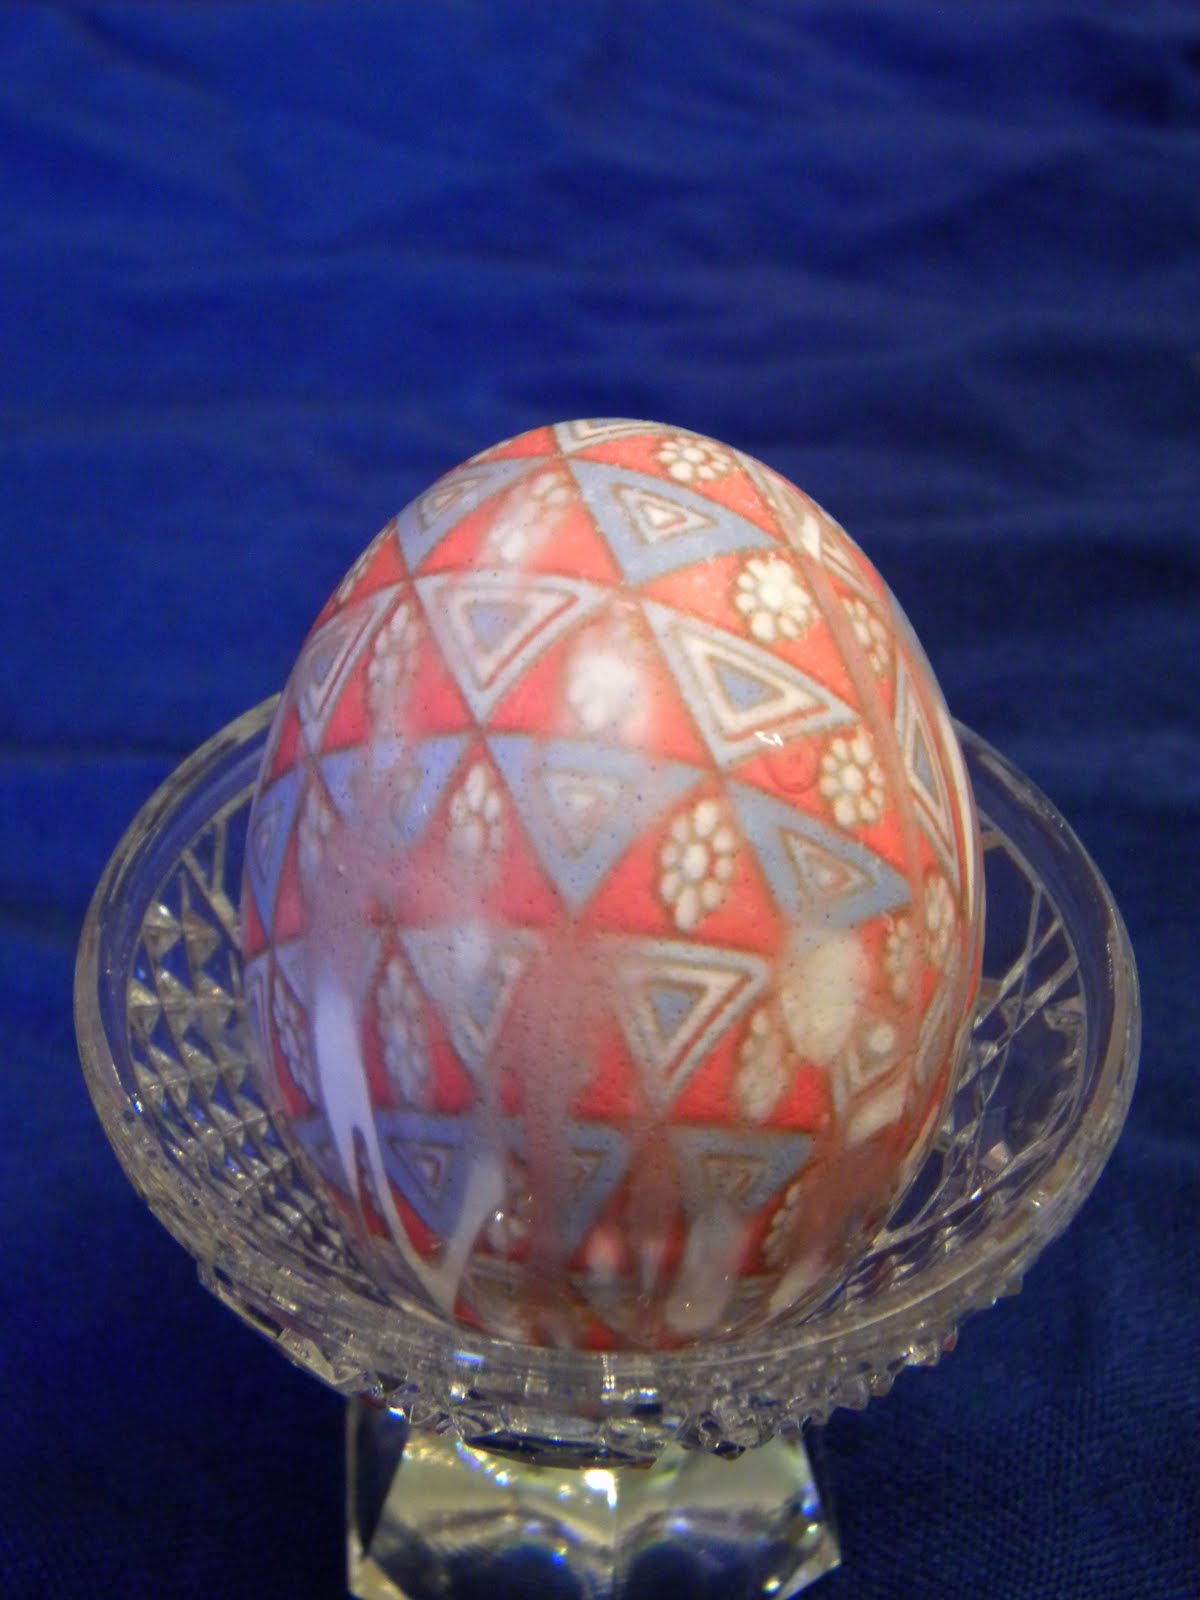 This is Samren's egg. The original tie was very dark red and blue, which resulted in very vibrant color on the dyed egg. Now we know!
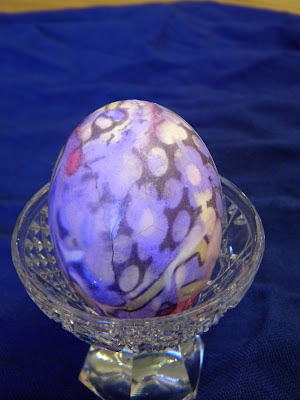 This is Taevy's egg. The die from this scarf bled more and turned it into more of a tie-dyed effect.
 This is Kendi's egg. As you can see, it didn't dye well at all. The original silk is in a picture above. We learned that light colored silks do not transfer as well onto the eggs.
 This is Bright's egg. The original tie was a vibrant orange and navy blue. This one would have been even better if I would have wrapped it more tightly and been more careful not to have creases!
 All in all we're very pleased, for a first try! I plan to have the children make one egg each year for our family stash, and make others to give as gifts to families/friends. I think this will be a neat tradition for our family. Seems like most of our traditions center around Christmas, so it will be good to add an Easter tradition!


6 comments:
Realy cool eggs. What a neat way to dye eggs. Is there something you can put on them to make them stronger so they don't break? Our eggs ended up being all white except for the names on them. We never had time to dye them so they all remained white.
Robin
What cool eggs. What a neat and differnt way to dye them. Is there something you can put on them to make them stronger? All our eggs were white this year except for the names on them. We ran out of time to color them so they all remained white.
Robin
This may have published twice,not sure.
Robin, I forgot to mention that after the eggs are finished they say to rub them with oil to give extra shine. We honestly didn't notice a big difference before/after oil. Of course, that doesn't make them stronger anyway! We have thought about adding a coat of clear laquer or glue to make the eggs stronger. I don't know of anything to do to make them stronger during the process though.
I have never heard of that before but I am impressed. I think we are going to have to try it. thanks for sharing a fun project.
Oh that is really cool! I've heard of it but never saw the details so thank you for posting that. I think we're going to be trying this! (Ugly tie contest? Hmmm collecting the silk could be fun!)
Wow! Those are amazing! I've never heard of this.
GREAT job!
Laurel :)
Post a Comment